| 일 | 월 | 화 | 수 | 목 | 금 | 토 |
|---|---|---|---|---|---|---|
| 1 | 2 | 3 | 4 | 5 | 6 | 7 |
| 8 | 9 | 10 | 11 | 12 | 13 | 14 |
| 15 | 16 | 17 | 18 | 19 | 20 | 21 |
| 22 | 23 | 24 | 25 | 26 | 27 | 28 |
- 티스토리챌린지
- PETERICA
- 기록으로 실력을 쌓자
- CKA 기출문제
- 코틀린 코루틴의 정석
- CloudWatch
- SRE
- tucker의 go 언어 프로그래밍
- AWS EKS
- 공부
- Rag
- kotlin
- kotlin coroutine
- Pinpoint
- aws
- Spring
- Kubernetes
- Java
- minikube
- golang
- 바이브코딩
- AI
- go
- 오블완
- 정보처리기사 실기 기출문제
- MySQL
- LLM
- APM
- CKA
- Linux
- Today
- Total
피터의 개발이야기
[EKS] 쿠버네티스 etcd 클러스터 백업, #2 etcd 내장 스냅샷 본문

ㅁ 개요
ㅇ 지난 시간 kubernetes에게 Etcd란, 백업과 복원을 위한 2가지 방법에 대해서 알아보았다.
ㅇ Etcd 내장 스냅샷 기능에 대해서 실습하는 과정을 정리하였다.
ㅇ 테스트환경은 minikube 환경을 사용하였다.
ㅇ 테스트는 스냅샷을 생성하고 테스트 Pod를 삭제 후 스냅샷 복구하여 삭제된 Pod를 복구하려 한다.
ㅇ 결론적으로 minikube 환경에서는 etcd가 pod타입이어서 복구가 불가하였다.
ㅇ 하지만 그 과정과 다른 참조페이지를 정리하였다.
1편
kubernetes에게 Etcd란?
kubernetes 백업의 필요성
Etcd의 백업 및 복구(Backup and Restore)
Etcd의 백업의 두가지 방법
2편 etcd 내장 스냅샷
3편 Velero를 이용한 AWS EKS 백업 복구 방법
ㅁ etcd 클러스터 백업
참조 : https://kubernetes.io/docs/tasks/administer-cluster/configure-upgrade-etcd/#backing-up-an-etcd-cluster
모든 Kubernetes 객체는 etcd에 저장된다. etcd는 각 마스터노드에 존재하고, key=value의 데이터는 마스터 노드의 /var/lib/etcd 에 저장된다. etcd는 built in 스냅샷 solution을 가지고 있으며, 이를통해 현재 실행중인 모든 리소스의 정보를 백업하고, 복구할 수 있다. etcd 클러스터 데이터를 주기적으로 백업하는 것은 모든 컨트롤 플레인 노드 손실과 같은 재해에서 Kubernetes 클러스터를 복구하는 데 중요한 역할을 한다. 스냅샷 파일에는 모든 Kubernetes 상태와 중요 정보가 포함되어 있다.
etcd 클러스터 백업은 etcd 내장 스냅샷과 볼륨 스냅샷의 두 가지 방법으로 수행할 수 있다. 그렇지만 내가 보기엔 etcd 내장 스냅샷방법과 볼륨 스냅샷은 큰 차이가 없었다. etcd가 Amazon Elastic Block Store와 같이 백업을 지원하는 스토리지 볼륨에서 실행 중인 경우 스토리지 볼륨의 스냅샷을 만들어 etcd 데이터를 백업한다. 이 때에 끝점, 인증서 등을 지정하여 스냅샷을 찍을 수 있다.
ㅁ etcd 내장 스냅샷
참조 : https://kubernetes.io/docs/tasks/administer-cluster/configure-upgrade-etcd/#built-in-snapshot
ETCDCTL_API=3 etcdctl --endpoints $ENDPOINT snapshot save snapshotdb
etcd는 내장 스냅샷을 지원한다. etcdctl snapshot save 명령을 사용하여 활성 멤버에서 스냅샷을 가져오거나
현재 etcd 프로세스에서 사용하지 않는 etcd 데이터 디렉토리에서 member/snap/db 파일을 복사하여 스냅샷을 만들 수 있다.
minikube에 존재하는 etcd에 대한 정보를 확인하고 필요한 endpoint를 확인 후 스냅샷 명령어를 실행하였다.
ㅁ 볼륨 스냅샷
etcdctl에서 제공하는 다양한 옵션을 사용하여 스냅샷을 찍을 수도 있다. 예를 들어
ETCDCTL_API=3 etcdctl -h
etcdctl에서 사용할 수 있는 다양한 옵션을 나열한다. 예를 들어 아래와 같이 끝점, 인증서 등을 지정하여 스냅샷을 찍을 수 있다.
ETCDCTL_API=3 etcdctl --endpoints=https://127.0.0.1:2379 \
  --cacert=<trusted-ca-file> --cert=<cert-file> --key=<key-file> \
  snapshot save <backup-file-location>
여기서 trusted-ca-file, cert-file및 key-file는 etcd Pod의 describe 또는 get -o yaml 명령어로 얻을 수 있다.
ㅁ etcd 상황확인
실제로 etcd가 내부에 어떻게 구성되어 있는지 살펴보았다.

# etcd pod 확인
$ kubectl get po -n kube-system etcd-docker-desktop

# etcd 버젼확인
$ kubectl exec -it -n kube-system etcd-docker-desktop -- etcd --version
running etcd on unsupported architecture "arm64" since ETCD_UNSUPPORTED_ARCH is set
etcd Version: 3.4.13
Git SHA: ae9734ed2
Go Version: go1.13.5
Go OS/Arch: linux/arm64
ㅇ minikube 내부 etcd 확인
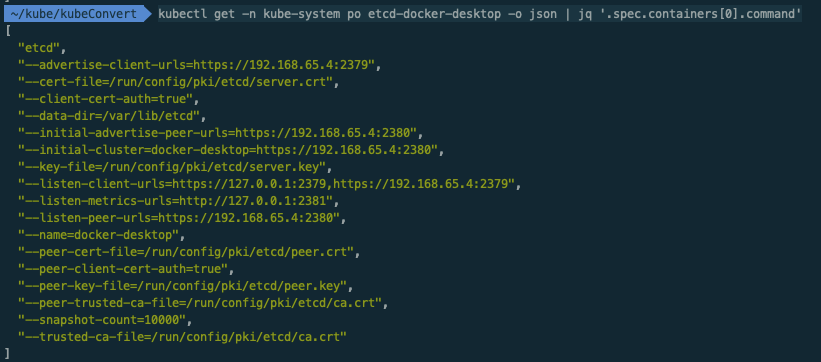
$ kubectl get -n kube-system po etcd-docker-desktop -o json | jq '.spec.containers[0].command'
[
  "etcd",
  "--advertise-client-urls=https://192.168.65.4:2379",
  "--cert-file=/run/config/pki/etcd/server.crt",
  "--client-cert-auth=true",
  "--data-dir=/var/lib/etcd",
  "--initial-advertise-peer-urls=https://192.168.65.4:2380",
  "--initial-cluster=docker-desktop=https://192.168.65.4:2380",
  "--key-file=/run/config/pki/etcd/server.key",
  "--listen-client-urls=https://127.0.0.1:2379,https://192.168.65.4:2379",
  "--listen-metrics-urls=http://127.0.0.1:2381",
  "--listen-peer-urls=https://192.168.65.4:2380",
  "--name=docker-desktop",
  "--peer-cert-file=/run/config/pki/etcd/peer.crt",
  "--peer-client-cert-auth=true",
  "--peer-key-file=/run/config/pki/etcd/peer.key",
  "--peer-trusted-ca-file=/run/config/pki/etcd/ca.crt",
  "--snapshot-count=10000",
  "--trusted-ca-file=/run/config/pki/etcd/ca.crt"
]
ㅇ etcd의 구성에 필요한 정보를 spec.containers.command에서 얻을 수 있었다.
ㅇ client 접속 URL(endpoints)을 127.0.0.1:2379, 192.168.65.4:2379를 확인할 수 있다.
ㅇ data dir은 /var/lib/etcd 임을 확인하였다.

$ kubectl get -n kube-system po etcd-docker-desktop -o json | jq '.spec.containers[0].volumeMounts'
[
  {
    "mountPath": "/var/lib/etcd",
    "name": "etcd-data"
  },
  {
    "mountPath": "/run/config/pki/etcd",
    "name": "etcd-certs"
  }
]
ㅇ etcd pod에 마운트된 볼륨의 경로로도 위치를 알 수 있다.
ㅁ 테스트를 위한 Pod 생성
apiVersion: apps/v1
kind: Deployment
metadata:
  name: recover-deployment
  labels:
    app: recover
    type: front-end
spec:
  template:
    metadata:
      name: recover-pod
      labels:
        app: recover
        type: front-end
    spec:
      containers:
      - name: nginx-container
        image: nginx:1.19
  replicas: 3
  selector:
    matchLabels:
      type: front-end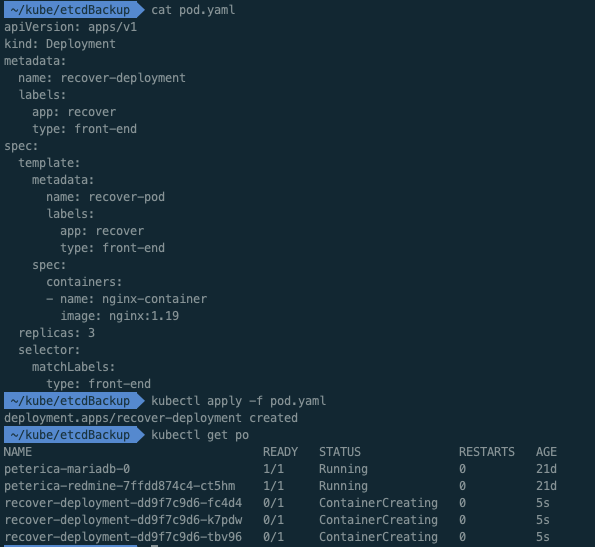
# pod 배포
$ kubectl apply -f pod.yaml
deployment.apps/recover-deployment created

# pod 생성확인
$ kubectl get po
NAME                                 READY   STATUS              RESTARTS   AGE
peterica-mariadb-0                   1/1     Running             0          21d
peterica-redmine-7ffdd874c4-ct5hm    1/1     Running             0          21d
recover-deployment-dd9f7c9d6-fc4d4   0/1     ContainerCreating   0          5s
recover-deployment-dd9f7c9d6-k7pdw   0/1     ContainerCreating   0          5s
recover-deployment-dd9f7c9d6-tbv96   0/1     ContainerCreating   0          5s
ㅇ 간단하게 3개의 nginx 파드를 배포하였다.
ㅁ 내장 스냅샵 만들기
kubernetes 공식 문서(Backing up an etcd cluster)를 참조하여 수행하였지만 한번에 되지 않아 트러블 슈팅을 하게 되었다.
ETCDCTL_API=3 etcdctl --endpoints=https://127.0.0.1:2379 snapshot save snapshotdb
ㅇ 문서를 기초로 스냅샵 명령어를 실행하였지만 반응이 없었다.
ㅇ 트러블슈팅을 위해 pod 로그를 확인하였다.
# etcd pod 로그확인
$ kubectl logs -n kube-system etcd-docker-desktop
2022-10-03 13:06:18.154756 I | embed: rejected connection from "127.0.0.1:62066" (error "remote error: tls: bad certificate", ServerName "")
ㅇ 로그 확인 시 https로 호출하는 것이 문제가 되는 것 같았다.
# https-> http:127.0.0.1:2379 변경 후 로그 확인
2022-10-03 13:18:08.032042 I | embed: rejected connection from "127.0.0.1:57120" (error "tls: first record does not look like a TLS handshake", ServerName "")
ㅇ 이번엔 tls에서 문제가 발생하여 인증서 관련 정보를 추가해 보았다.
ㅇ 구체적으로 cacert, cert, key 정보를 추가하여 실행해 보았다.
# 스냅샷 실행
$ kubectl exec -it -n kube-system etcd-docker-desktop --
etcdctl --endpoints=https://127.0.0.1:2379
--cacert=/run/config/pki/etcd/ca.crt
--cert=/run/config/pki/etcd/server.crt
--key=/run/config/pki/etcd/server.key
snapshot save snapshotdb

{"level":"info","ts":1664804166.2272468,"caller":"snapshot/v3_snapshot.go:119","msg":"created temporary db file","path":"snapshotdb.part"}
{"level":"info","ts":"2022-10-03T13:36:06.232Z","caller":"clientv3/maintenance.go:200","msg":"opened snapshot stream; downloading"}
{"level":"info","ts":1664804166.2328498,"caller":"snapshot/v3_snapshot.go:127","msg":"fetching snapshot","endpoint":"https://127.0.0.1:2379"}
{"level":"info","ts":"2022-10-03T13:36:06.246Z","caller":"clientv3/maintenance.go:208","msg":"completed snapshot read; closing"}
{"level":"info","ts":1664804166.2497785,"caller":"snapshot/v3_snapshot.go:142","msg":"fetched snapshot","endpoint":"https://127.0.0.1:2379","size":"2.7 MB","took":0.022466833}
{"level":"info","ts":1664804166.249905,"caller":"snapshot/v3_snapshot.go:152","msg":"saved","path":"snapshotdb"}
Snapshot saved at snapshotdb

# pod 로그 확인
2022-10-03 13:36:06.233701 I | etcdserver/api/v3rpc: sending database snapshot to client 2.7 MB [2678784 bytes]
2022-10-03 13:36:06.246254 I | etcdserver/api/v3rpc: sending database sha256 checksum to client [32 bytes]
2022-10-03 13:36:06.246341 I | etcdserver/api/v3rpc: successfully sent database snapshot to client 2.7 MB [2678784 bytes]
ㅇ 스냅샷이 정상적으로 작동하였다.
ㅁ 스냅샷 확인
$ kubectl exec -it -n kube-system etcd-docker-desktop -- etcdctl --write-out=table snapshot status snapshotdb
+----------+----------+------------+------------+
|   HASH   | REVISION | TOTAL KEYS | TOTAL SIZE |
+----------+----------+------------+------------+
| 53982115 |  2236835 |       1014 |     2.7 MB |
+----------+----------+------------+------------+
ㅁ 테스트를 위한 샘플 Pod 삭제
작업 중에 실수로 namespcae 혹은 deployment를 삭제할 수 있다.
여담으로 보통 이런 경우 작업 전에 나의 경우 개별 백업을 진행한다.
# 작업 전 현재 객체에 대한 백업
kubectl get deployments.apps recover-deployment -o yaml >> backUp.yaml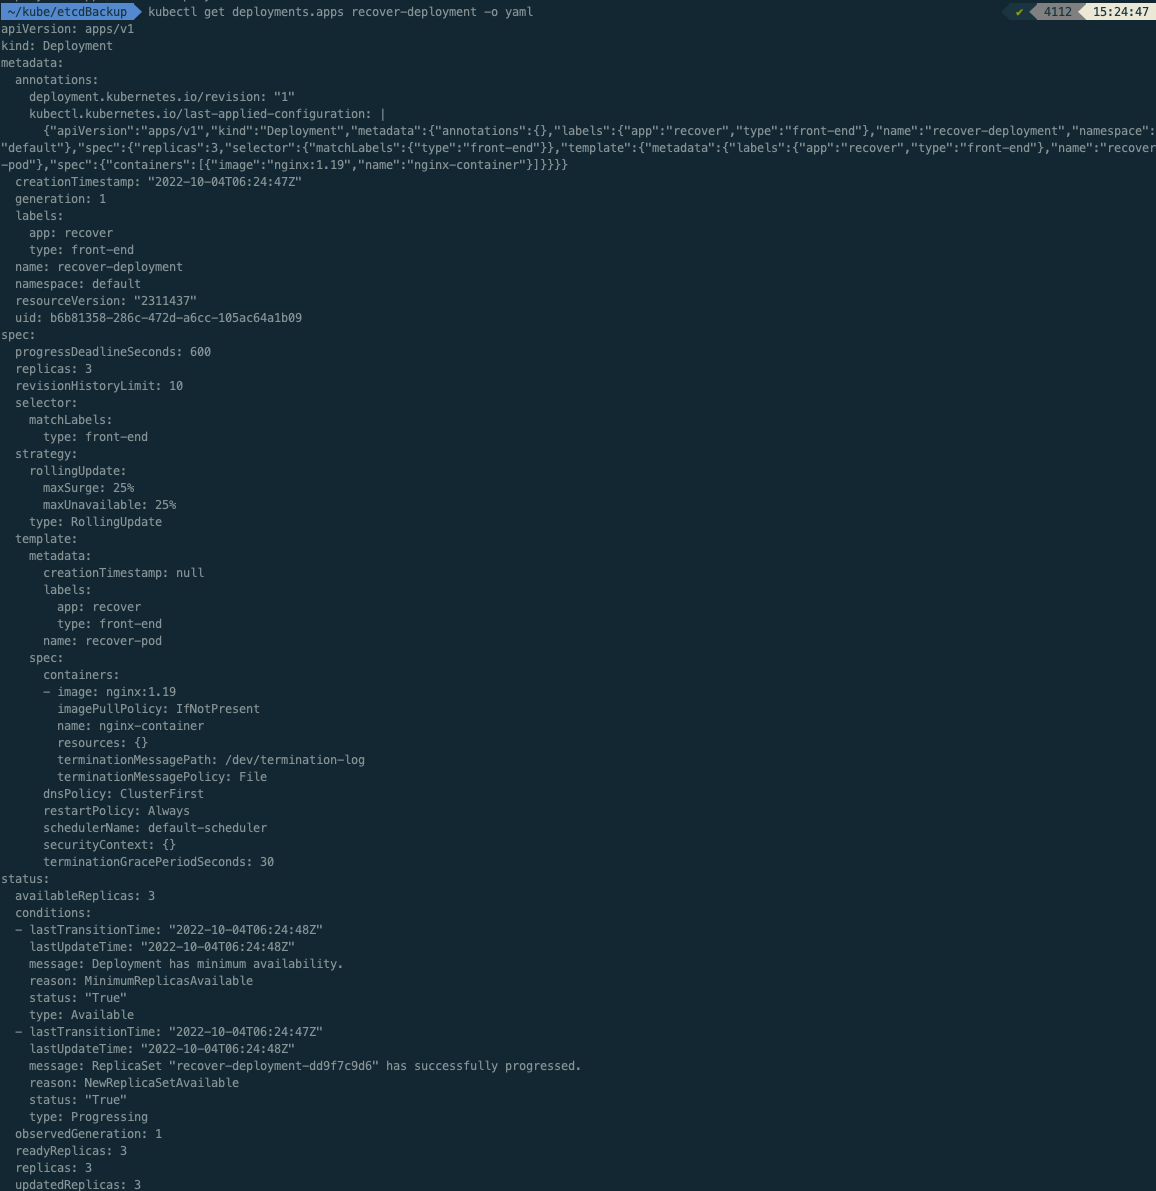
ㅇ 실수가 있어도 백업된 yaml를 다시 배포하면 복구가 된다.
# pod 삭제
$ kubectl delete -f pod.yaml
deployment.apps "recover-deployment" deleted
ㅇ 복구 테스트를 위해 삭제를 하였다.
ㅁ 스냅샷 복구 작업
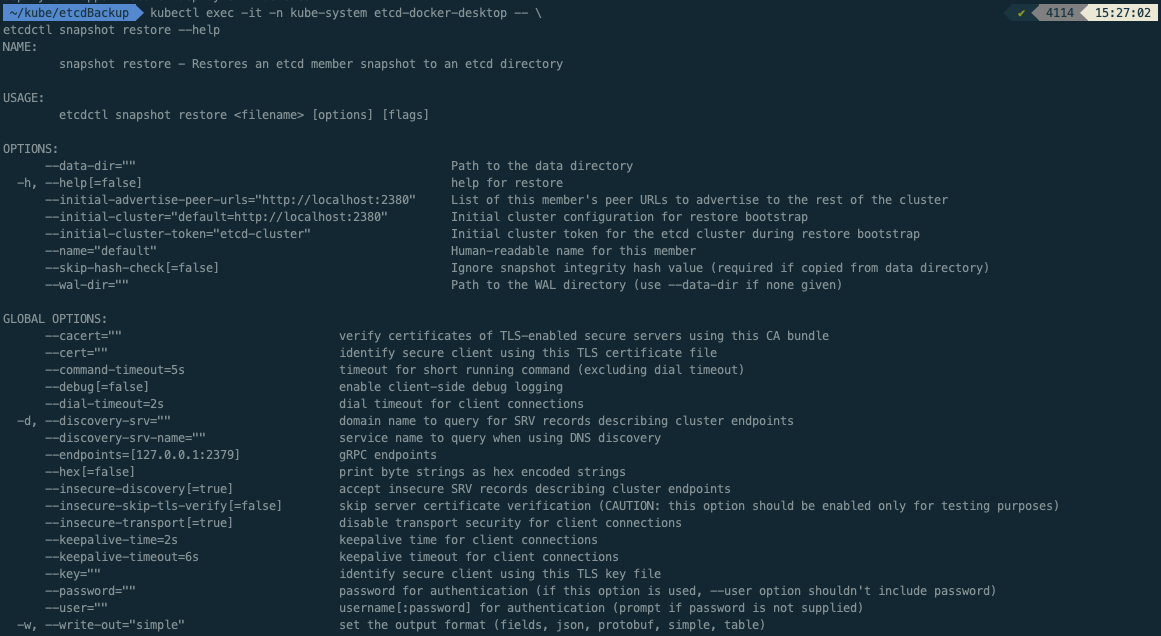
$ kubectl exec -it -n kube-system etcd-docker-desktop -- \ ✔ 4114 15:27:02
etcdctl snapshot restore --help
NAME:
snapshot restore - Restores an etcd member snapshot to an etcd directory
USAGE:
etcdctl snapshot restore <filename> [options] [flags]
OPTIONS:
--data-dir="" Path to the data directory
-h, --help[=false] help for restore
--initial-advertise-peer-urls="http://localhost:2380" List of this member's peer URLs to advertise to the rest of the cluster
--initial-cluster="default=http://localhost:2380" Initial cluster configuration for restore bootstrap
--initial-cluster-token="etcd-cluster" Initial cluster token for the etcd cluster during restore bootstrap
--name="default" Human-readable name for this member
--skip-hash-check[=false] Ignore snapshot integrity hash value (required if copied from data directory)
--wal-dir="" Path to the WAL directory (use --data-dir if none given)
GLOBAL OPTIONS:
--cacert="" verify certificates of TLS-enabled secure servers using this CA bundle
--cert="" identify secure client using this TLS certificate file
--command-timeout=5s timeout for short running command (excluding dial timeout)
--debug[=false] enable client-side debug logging
--dial-timeout=2s dial timeout for client connections
-d, --discovery-srv="" domain name to query for SRV records describing cluster endpoints
--discovery-srv-name="" service name to query when using DNS discovery
--endpoints=[127.0.0.1:2379] gRPC endpoints
--hex[=false] print byte strings as hex encoded strings
--insecure-discovery[=true] accept insecure SRV records describing cluster endpoints
--insecure-skip-tls-verify[=false] skip server certificate verification (CAUTION: this option should be enabled only for testing purposes)
--insecure-transport[=true] disable transport security for client connections
--keepalive-time=2s keepalive time for client connections
--keepalive-timeout=6s keepalive timeout for client connections
--key="" identify secure client using this TLS key file
--password="" password for authentication (if this option is used, --user option shouldn't include password)
--user="" username[:password] for authentication (prompt if password is not supplied)
-w, --write-out="simple" set the output format (fields, json, protobuf, simple, table)

$ kubectl exec -it -n kube-system etcd-docker-desktop -- \
     etcdctl --endpoints=https://127.0.0.1:2379 \
			 --name="default" \
			 --cacert="/run/config/pki/etcd/ca.crt" \
			 --cert="/run/config/pki/etcd/server.crt" \
			 --key="/run/config/pki/etcd/server.key" \
			 --data-dir="/var/lib/etcd-backup" \
			 --initial-cluster="default=https://127.0.0.1:2380" \
			 --initial-cluster-token="etcd-cluster-1" \
			 --initial-advertise-peer-urls="https://127.0.0.1:2380" \
			 snapshot restore /snapshotdb

{"level":"info","ts":1664870201.0088787,"caller":"snapshot/v3_snapshot.go:296","msg":"restoring snapshot","path":"/snapshotdb","wal-dir":"/var/lib/etcd-backup/member/wal","data-dir":"/var/lib/etcd-backup","snap-dir":"/var/lib/etcd-backup/member/snap"}
{"level":"info","ts":1664870201.0203073,"caller":"mvcc/kvstore.go:380","msg":"restored last compact revision","meta-bucket-name":"meta","meta-bucket-name-key":"finishedCompactRev","restored-compact-revision":2310447}
{"level":"info","ts":1664870201.0231388,"caller":"membership/cluster.go:392","msg":"added member","cluster-id":"7581d6eb2d25405b","local-member-id":"0","added-peer-id":"e92d66acd89ecf29","added-peer-peer-urls":["https://127.0.0.1:2380"]}
{"level":"info","ts":1664870201.027141,"caller":"snapshot/v3_snapshot.go:309","msg":"restored snapshot","path":"/snapshotdb","wal-dir":"/var/lib/etcd-backup/member/wal","data-dir":"/var/lib/etcd-backup","snap-dir":"/var/lib/etcd-backup/member/snap"}
ㅇsnapshotdb 파일 기준으로 /var/lib/etcd_backup 라는 데이터 폴더를 생성하였다.
ㅇ etcd가 바뀐 폴더를 바라보도록 해줘야한다.
ㅁ etcd의 data_dir 변경작업
참조: https://shjeong92.github.io/2021/06/04/Learning-Kubernetes-09.html
# command 변경 및 추가
--data-dir=/var/lib/etcd-backup
--initial-cluster-token=etcd-cluster-1

#volumeMounts의 mountPath 변경
/var/lib/etcd-from-backup

#volumes hostPath 변경
/var/lib/etcd-backup
ㅇ etcd 클러스터가 data-dir를 변경된 경로로 바라볼 수 있도록 pod를 수정하였다.
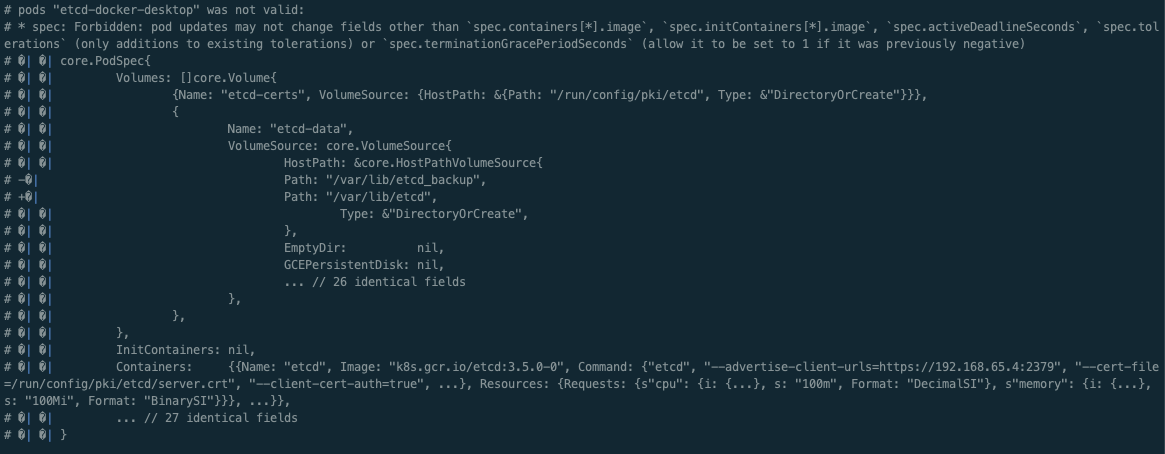
# pods "etcd-docker-desktop" was not valid:
# * spec: Forbidden: pod updates may not change fields other than `spec.containers[*].image`, `spec.initContainers[*].image`, `spec.activeDeadlineSeconds`, `spec.tolerations` (only additions to existing tolerations) or `spec.terminationGracePeriodSeconds` (allow it to be set to 1 if it was previously negative)
ㅇ 하지만 pod 타입은 container의 image만 변경이 가능하고 다른 설정값들은 변경을 할 수 없었다.
ㅇ 테스트로 삭제된 pod들을 복구하려고 시도하였지만, pod로 생성된 etcd를 deployment로 변경해서 image말고 다른 설정도 변경하는 작업을 진행해야하지만, 나는 여기까지만 테스트 하려고 한다.
ㅇ 혹시 참조했던 링크를 여기에 남긴다.
https://shjeong92.github.io/2021/06/04/Learning-Kubernetes-09.html
ㅁ 함께 보면 좋은 사이트
Operating etcd clusters for Kubernetes
etcd is a consistent and highly-available key value store used as Kubernetes' backing store for all cluster data. If your Kubernetes cluster uses etcd as its backing store, make sure you have a back up plan for those data. You can find in-depth information
kubernetes.io
ㅇ kubernetes etcd 백업방법
Disaster recovery
etcd v3 snapshot & restore facilities
etcd.io
ㅇ etcd 공식문헌, etcd 복구방법
[ #9 ] 클러스터 백업 & 복구 - Hyuk's devlog
이번 포스트에서는 ETCD database를 이용한 클러스터 백업 및 복구 방법에 대해서 다뤄보겠습니다. etcd란 etcd는 모든 클러스터 데이터에 대한 Kubernetes의 백업 저장소로 사용되는 일관되고 가용성이
shjeong92.github.io
ㅇ 참조한 페이지
'AWS > EKS' 카테고리의 다른 글
| [EKS] EKS v1.22 업그레이드 중 Spring boot DNS Cache 트러블슈팅 (2) | 2022.10.11 |
|---|---|
| [EKS] 쿠버네티스 etcd 클러스터 백업, #3 Velero를 이용한 AWS EKS 백업 복구 방법 (0) | 2022.10.08 |
| [EKS] 쿠버네티스 etcd 클러스터 백업, #1 ETCD란, 백업과 복원을 위한 2가지 방법 (0) | 2022.10.04 |
| [EKS] eksctl 자주사용 명령어 (0) | 2022.10.02 |
| [EKS] Amazon EKS 버전 업그레이드, #3 kubectl 설치 또는 업데이트 (0) | 2022.09.29 |


