
- 분류 전체보기 (977)

| 일 | 월 | 화 | 수 | 목 | 금 | 토 |
|---|---|---|---|---|---|---|
| 1 | 2 | 3 | 4 | 5 | 6 | 7 |
| 8 | 9 | 10 | 11 | 12 | 13 | 14 |
| 15 | 16 | 17 | 18 | 19 | 20 | 21 |
| 22 | 23 | 24 | 25 | 26 | 27 | 28 |
- minikube
- golang
- 공부
- kotlin
- kotlin coroutine
- tucker의 go 언어 프로그래밍
- PETERICA
- Java
- MySQL
- aws
- Kubernetes
- 정보처리기사 실기 기출문제
- LLM
- Linux
- go
- CKA 기출문제
- 오블완
- AWS EKS
- CKA
- Spring
- Pinpoint
- 코틀린 코루틴의 정석
- AI
- APM
- 티스토리챌린지
- Rag
- 바이브코딩
- CloudWatch
- 기록으로 실력을 쌓자
- SRE
- Today
- Total
피터의 개발이야기
[EKS] AWS EKS에 EFS 연동하기 본문

ㅁ 이전 글
[Kubernetes] 쿠버네티스 볼륨 개념 2편 (pv, pvc, AWS EBS, AWS EFS ) 글에서 EBS와 EFS의 차이를 설명하였다. 이번 글에서는 AWS EKS에 EFS를 연동하는 방법에 대해서 공부하였다.
ㅁ AWS EBS와 AWS EFS 차이
EBS는 쿠버네티스 PV 설정 시 ReadWriteOnce(노드 하나에만 읽기쓰기 가능)만 가능하다. 그 이유는 AvailabilityZone에 종속되기 때문에 다른 AZ에 있는 WorkNode에 EBS 스토리지를 공유할 수 없다. 쿠버네티스의 철학에 시스템 이중화를 위해 2개 이상의 AZ에 WorkNode을 생성하게 되면 작업 상 공유가 필요한 파일이 있는 경우 EFS를 활용해야 한다.
AWS EFS를 사용하기 위해서는 EFS CSI(Container Storage Interface) Driver가 설치되어야 한다.
ㅁ helm을 이용한 AWS EFS CSI(Container Storage Interface) Driver 설치
EKS 1.22버젼에 맞는 CSI Driver 버젼은 이곳에서 확인할 수 있다.
Amazon EFS driver은 이곳을 참조하여 helm으로 설치하였다.
helm repo add aws-efs-csi-driver https://kubernetes-sigs.github.io/aws-efs-csi-driver/ㅇ Helm repo 추가
helm repo updateㅇ Helm repo 업데이트
$ helm upgrade -i aws-efs-csi-driver aws-efs-csi-driver/aws-efs-csi-driver \
 --namespace kube-system \
 --set image.repository=602401143452.dkr.ecr.ap-northeast-2.amazonaws.com/eks/aws-efs-csi-driver \
 --set controller.serviceAccount.create=false \
 --set controller.serviceAccount.name=efs-csi-controller-sa

Release "aws-efs-csi-driver" has been upgraded. Happy Helming!
NAME: aws-efs-csi-driver
LAST DEPLOYED: Sat Oct 15 19:13:53 2022
NAMESPACE: kube-system
STATUS: deployed
REVISION: 2
TEST SUITE: None
NOTES:
To verify that aws-efs-csi-driver has started, run:

kubectl get pod -n kube-system -l "app.kubernetes.io/name=aws-efs-csi-driver,app.kubernetes.io/instance=aws-efs-csi-driver"
ㅇ helm으로 efs-csi-driver 설치

ㅇ kube-system에 efs-csi-driver pod가 생성된 것을 확인하였다.
ㅁ Amazon EFS 파일 시스템 생성
ㅇ AWS 사용자설명서 > Amazon EFS CSI 드라이버에서는 EFS 생성을 CLI 바탕으로 안내를 해 주고 있다.
vpc_id=$(aws eks describe-cluster \
    --name k8s-peterica \
    --query "cluster.resourcesVpcConfig.vpcId" \
    --output text)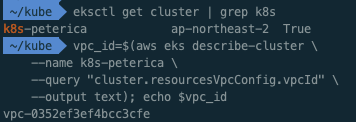
ㅇ 클러스터가 있는 VPC ID를 검색하고 이후 단계에서 사용할 수 있도록 변수에 저장하였다.
cidr_range=$(aws ec2 describe-vpcs \
    --vpc-ids $vpc_id \
    --query "Vpcs[].CidrBlock" \
    --output text);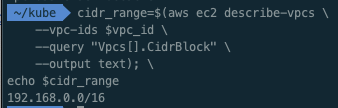
ㅇ 클러스터의 VPC에 대한 CIDR 범위를 검색하고 이후 단계에서 사용할 수 있도록 변수에 저장한다.
security_group_id=$(aws ec2 create-security-group \
    --group-name PeterEfsSecurityGroup \
    --description "Peter EFS security group" \
    --vpc-id $vpc_id \
    --output text)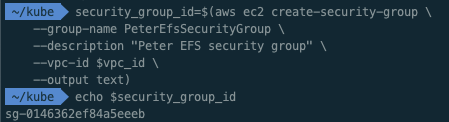
ㅇ Amazon EFS 탑재 지점에 대한 인바운드 NFS 트래픽을 허용하는 인바운드 규칙을 사용하여 보안 그룹을 생성한다.
aws ec2 authorize-security-group-ingress \
    --group-id $security_group_id \
    --protocol tcp \
    --port 2049 \
    --cidr $cidr_range

{
    "Return": true,
    "SecurityGroupRules": [
        {
            "SecurityGroupRuleId": "sgr-0efcb3042e78e3586",
            "GroupId": "sg-0146362ef84a5eeeb",
            "GroupOwnerId": "94**********",
            "IsEgress": false,
            "IpProtocol": "tcp",
            "FromPort": 2049,
            "ToPort": 2049,
            "CidrIpv4": "192.168.0.0/16"
        }
    ]
}
ㅇ 클러스터의 VPC에 대한 CIDR의 인바운드 NFS 트래픽을 허용하는 인바운드 규칙을 생성한다.
file_system_id=$(aws efs create-file-system \
    --region ap-northeast-2 \
    --performance-mode generalPurpose \
    --query 'FileSystemId' \
    --output text)
ㅇ Amazon EKS 클러스터용 Amazon EFS 파일 시스템을 생성한다.
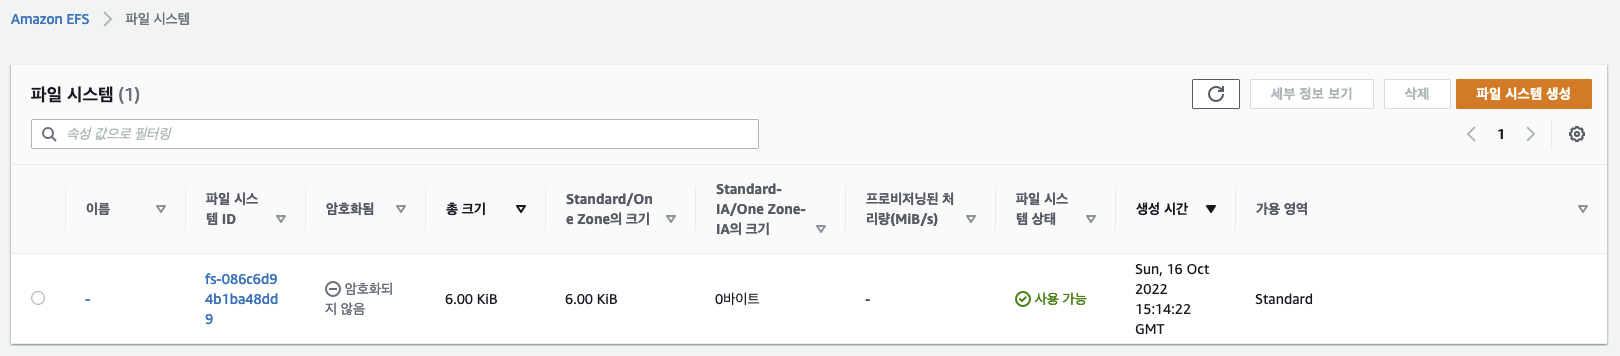
ㅇ AWS Console에서도 생성된 EFS를 확인 할 수 있었다.
ㅇ 이제 EFS를 탑재할 대상을 만들어야 한다.
$ kubectl get nodes
NAME                                                STATUS   ROLES    AGE   VERSION
ip-192-168-69-230.ap-northeast-2.compute.internal   Ready    <none>   30m   v1.22.12-eks-ba74326
ㅇ workNode의 IP를 확인한다.
aws ec2 describe-subnets \
    --filters "Name=vpc-id,Values=$vpc_id" \
    --query 'Subnets[*].{SubnetId: SubnetId,AvailabilityZone: AvailabilityZone,CidrBlock: CidrBlock}' \
    --output table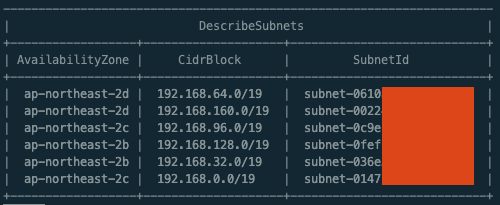
ㅇ VPC에 있는 서브넷의 ID와 서브넷이 있는 가용 영역을 확인한다.
aws efs create-mount-target \
    --file-system-id $file_system_id \
    --subnet-id subnet-0610a539fad89b046 \
    --security-groups $security_group_id
ㅇ 노드가 있는 서브넷에 대한 마운트 타갯을 추가한다. workNode 192.168.69.230는 CidrBlockID가 있는 서브넷 subnet-0610a539fad89b046에 속해 있다. 위 명령으로 노드가 있는 서브넷에 EFS의 마운트 타갯을 생성한다.
ㅁ 샘플 애플리케이션 배포
ㅇ AWS 사용설명서에서는 생성한 영구 볼륨을 사용하는 샘플 애플리케이션을 배포를 위한 소스를 깃으로 제공하고 있다.
# 깃 다운로드
git clone https://github.com/kubernetes-sigs/aws-efs-csi-driver.git

# 폴더 이동
cd aws-efs-csi-driver/examples/kubernetes/multiple_pods/
# pv.yaml
apiVersion: v1
kind: PersistentVolume
metadata:
  name: efs-pv
spec:
  capacity:
    storage: 5Gi
  volumeMode: Filesystem
  accessModes:
    - ReadWriteMany
  persistentVolumeReclaimPolicy: Retain
  storageClassName: efs-sc
  csi:
    driver: efs.csi.aws.com
    volumeHandle: fs-086c6d94b1ba48dd9

# PV 생성
$ kubectl apply -f specs/pv.yaml
ㅇ pv.yaml 파일에 생성된 파일시스템 ID를 적용하여 PV를 생성한다.
ㅇ Status는 Bound가 되어 있다.
# claim.yaml
apiVersion: v1
kind: PersistentVolumeClaim
metadata:
  name: efs-claim
spec:
  accessModes:
    - ReadWriteMany
  storageClassName: efs-sc
  resources:
    requests:
      storage: 5Gi

# pvc 생성
$kubectl apply -f specs/claim.yaml
ㅇ PVC를 생성하였다.
# storageclass.yaml
kind: StorageClass
apiVersion: storage.k8s.io/v1
metadata:
  name: efs-sc
provisioner: efs.csi.aws.com

# storageClass 생성
$ kubectl apply -f specs/storageclass.yaml
ㅇ PVC와 storageClass를 생성하였다.
ㅁ 테스트 Pod 실행
apiVersion: v1
kind: Pod
metadata:
  name: app1
spec:
  containers:
  - name: app1
    image: busybox
    command: ["/bin/sh"]
    args: ["-c", "while true; do echo $(date -u) >> /data/out1.txt; sleep 5; done"]
    volumeMounts:
    - name: persistent-storage
      mountPath: /data
  volumes:
  - name: persistent-storage
    persistentVolumeClaim:
      claimName: efs-claim
ㅇ /data/out1.txt를 생성하는 pod를 2개 실행하였다.
ㅁ Pod 실행 트러블 슈팅
Events:
  Type     Reason       Age                    From               Message
  ----     ------       ----                   ----               -------
  Normal   Scheduled    8m18s                  default-scheduler  Successfully assigned default/app1 to ip-192-168-69-230.ap-northeast-2.compute.internal
  Warning  FailedMount  6m15s                  kubelet            Unable to attach or mount volumes: unmounted volumes=[persistent-storage], unattached volumes=[kube-api-access-g4vk7 persistent-storage]: timed out waiting for the condition
  Warning  FailedMount  2m1s (x10 over 8m18s)  kubelet            MountVolume.SetUp failed for volume "efs-pv" : rpc error: code = Internal desc = Could not mount "fs-086c6d94b1ba48dd9:/" at "/var/lib/kubelet/pods/25a73c18-9231-413b-a022-2a717cdca2a4/volumes/kubernetes.io~csi/efs-pv/mount": mount failed: exit status 1
Mounting command: mount
Mounting arguments: -t efs -o tls fs-086c6d94b1ba48dd9:/ /var/lib/kubelet/pods/25a73c18-9231-413b-a022-2a717cdca2a4/volumes/kubernetes.io~csi/efs-pv/mount
Output: Failed to resolve "fs-086c6d94b1ba48dd9.efs.ap-northeast-2.amazonaws.com". The file system mount target ip address cannot be found, please pass mount target ip address via mount options.
User: arn:aws:sts::942525724688:assumed-role/eksctl-k8s-peterica-nodegroup-wor-NodeInstanceRole-1IVMGZHEN95PY/i-0c396b2ccc05b9e8e is not authorized to perform: elasticfilesystem:DescribeMountTargets on the specified resource
Warning: config file does not have fips_mode_enabled item in section mount.. You should be able to find a new config file in the same folder as current config file /etc/amazon/efs/efs-utils.conf. Consider update the new config file to latest config file. Use the default value [fips_mode_enabled = False].Warning: config file does not have fips_mode_enabled item in section mount.. You should be able to find a new config file in the same folder as current config file /etc/amazon/efs/efs-utils.conf. Consider update the new config file to latest config file. Use the default value [fips_mode_enabled = False].
  Warning  FailedMount  104s (x2 over 3m58s)  kubelet  Unable to attach or mount volumes: unmounted volumes=[persistent-storage], unattached volumes=[persistent-storage kube-api-access-g4vk7]: timed out waiting for the condition
ㅇ pod를 실행하는 과정에서 문제가 발생하였다.
The file system mount target ip address cannot be found, please pass mount target ip address via mount options.
ㅇ 힌트를 얻어 EFS의 마운트 타갯을 다시 생성하였더니 해결 되었다.
ㅇ 아마도 명령어 실행 시 오타가 발생한 것 같다.
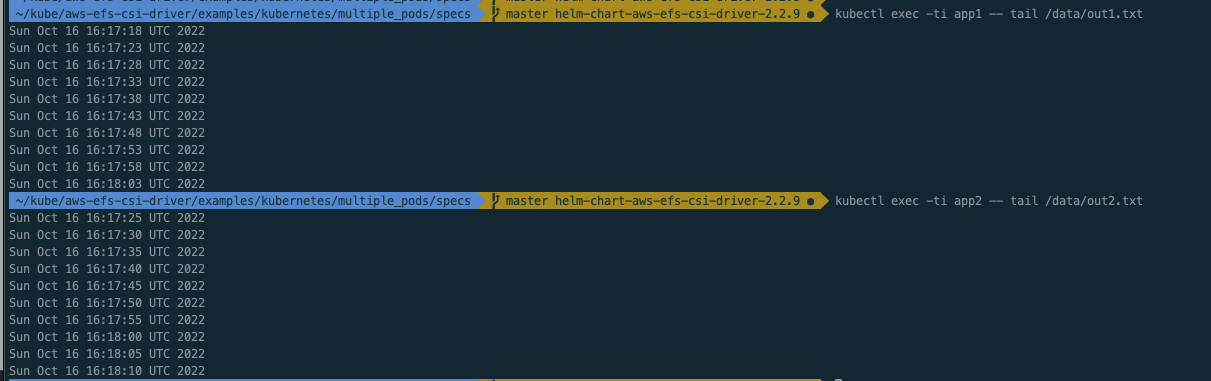
ㅇ 마운트가 정상적으로 잘 되어 pod의 로그를 확인 할 수 있었다.
ㅁ 테스트 완료 후 리소스 정리
$ kubectl delete -f specs/
ㅇ 테스트를 완료한 후에 생성된 리소스는 제거하였다.
eksctl scale nodegroup --name=work-nodes --cluster=k8s-peterica --nodes=0 --nodes-min=0
ㅇ workNode도 종료처리 하였다.
ㅇ pv 생성 시
persistentVolumeReclaimPolicy: Retain
옵션을 주었기 때문에 PV, PVC를 삭제하여도 EFS 파일 시스템의 정보는 그대로 남아있다.
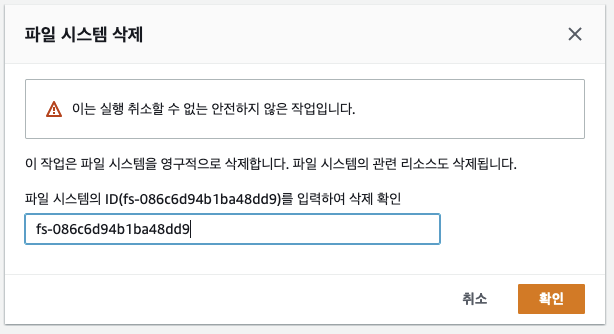
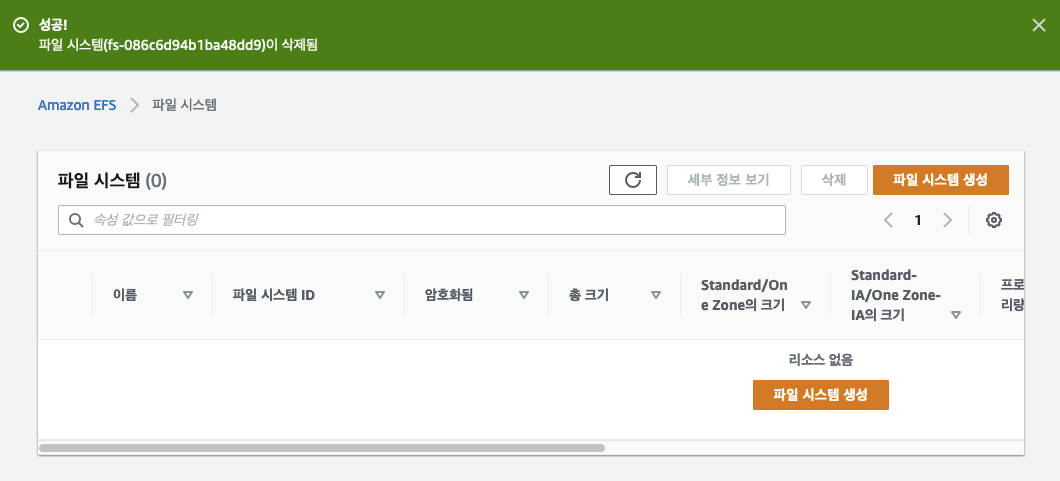
ㅇ EFS는 콘솔에서 삭제처리 하였다.
ㅁ 에필로그
ㅇ tistory가 카카오에서 운영하기 때문에 테스트 중에 저장이 되지않아서 다시 테스트를 진행하였다.
ㅇ 여담이지만, 블러그를 이중화해서 운영해야겠다는 생각이 들었다.
ㅇ 급할 때에 내가 경험했던 히스토리가 한 순간에 날아갈 수도 있다는 생각에 아찔했다.
ㅁ 함께 보면 좋은 사이트
https://docs.aws.amazon.com/eks/latest/userguide/efs-csi.html
Amazon EFS CSI driver - Amazon EKS
Because Amazon EFS is an elastic file system, it doesn't enforce any file system capacity limits. The actual storage capacity value in persistent volumes and persistent volume claims isn't used when creating the file system. However, because storage capaci
docs.aws.amazon.com
ㅇ Amazon EFS 파일 시스템을 Amazon EKS의 포드에 마운트 방법

'AWS > EKS' 카테고리의 다른 글
| [EKS] EKS가 ContainerCreating 상태에서 멈추는 문제 해결, eks cni plugin troubleshooting (1) | 2022.11.16 |
|---|---|
| [EKS] EKS Bastion 구성을 위한 kubectl, helm, eksctl, jq 설치 (0) | 2022.10.18 |
| [EKS] EKS v1.22 업그레이드 중 Spring boot DNS Cache 트러블슈팅 (2) | 2022.10.11 |
| [EKS] 쿠버네티스 etcd 클러스터 백업, #3 Velero를 이용한 AWS EKS 백업 복구 방법 (0) | 2022.10.08 |
| [EKS] 쿠버네티스 etcd 클러스터 백업, #2 etcd 내장 스냅샷 (0) | 2022.10.04 |


